

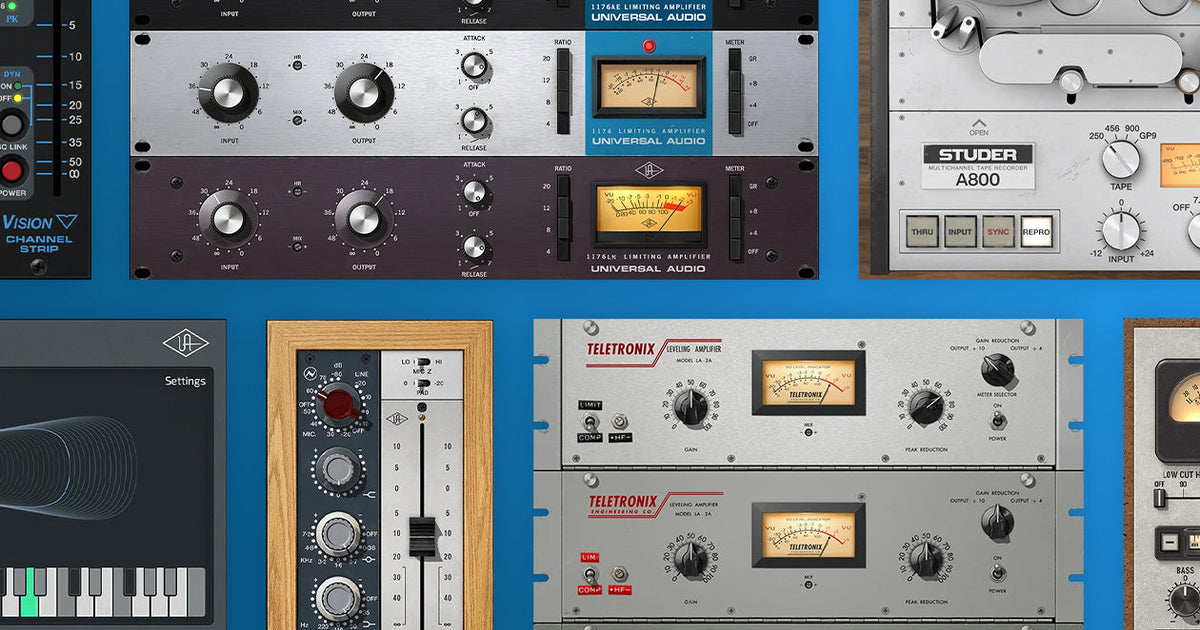

Using multiple plug-in effects can intimidating when you’re just starting out.
Between EQs, compressors, preamps, reverbs, delays, saturation, tape machines, and guitar amps, it’s easy to get overwhelmed. The good news? A great signal chain can be surprisingly simple.
Once you learn the basics, you can experiment with confidence and start building chains that work for your sound. In this guide, we’ll build three easy signal chains using plug-ins included in the UAD Spark Studio subscription.
In this article, we show you how to build three simple plug-in chains for vocals, guitar, and drums.
What Is a Plug-In Chain?
A signal chain is any combination of effects that your audio passes through while recording or mixing music. For example, a vocal might pass through a preamp, pitch correction, compressor, and reverb.
The interaction of the effects is important to understand. For example, a compressor responds differently to a clean signal than it does to a heavily EQ’d or saturated signal. A reverb sounds different depending on what you feed into it. And a guitar amp can sound completely different depending on which effects you put in front of it.
Vocal Plug-In Chain
Topline Vocal Tune + Neve 1073 + LA-2A + Pure Plate Reverb
Vocals are some of the easiest places to get overwhelmed when it comes to plug-ins.
You might hear that you need a de-esser, EQ, two compressors, saturation, delay, reverb, automation, pitch correction, and approximately seventeen other things before your vocal is “finished.”
While every track is situational and may need different elements here and there, it’s good to know where to start. This signal chain is equivalent to your favorite pair of blue jeans: easy to accessorize or keep simple, but they always feel good and fit with almost any outfit.

Adding combinations of UAD plug-ins to your vocal recordings gives you the same sounds used by top artists and producers.
Step 1: Use Pitch Correction First
We recommend putting pitch correction first in the processing chain, and Topline Vocal Tune is designed to provide everything from subtle correction to obvious hard-tuned effects depending on your desired result.
First, make sure the song’s key and scale are correct. Next, decide how natural or obvious you want the effect to sound. Start by setting your Tune Speed to around 50 and adjusting from there. Other parameters on Topline Vocal Tune can help make expression and sustain sound more natural or robotic. And the Formant helps adjust the tone, color, and character of the vocal.
Step 2: Get Classic Neve Color
The Neve 1073 is one of the most recognizable preamp and EQ designs in recording history. This is a classic preamp and EQ that can add rich low end and an open top end, making it a natural starting point for vocals.
The first thing to understand is that the 1073 isn’t just an EQ. The preamp section can add character to your vocal, while the EQ lets you shape its overall tone. When using it, here are a few tips:
- Get rid of the rumble. You likely can’t hear it, but it takes up space. Use the high-pass filter at around 80 Hz or 160 Hz to remove unnecessary low-end.
- Try a small low-frequency boost. If the vocal needs extra body, try a subtle boost anywhere between 100 and 300 Hz.
- Cut muddy low-mids. If it sounds boxy, try cutting in the 200 to 500 Hz range.
- Add some sparkle. For presence and air, boost the top end very subtly.
“Reverb isn’t just an effect. It’s the space you’re bringing the listener into.”
Step 3: Add a Vintage Optical Compressor
The LA-2A is an optical tube compressor known for smooth, musical leveling. It is especially useful when you want a vocal to stay consistently present without sounding aggressively compressed.
Start by turning up the Peak Reduction until you hear the vocal start to sound more even, with less spikes in volume. Listen to the words. Are they becoming easier to hear? Is the vocal sitting more consistently in the mix? If the compressor starts making the vocal feel flat, lifeless, or overly squashed, back it off a bit.
A good starting point is around 2 to 5 dB of gain reduction during louder sections. Don’t worry if your exact number is different. This is just a good place to start if you want a more transparent effect.
Step 4: Use Reverb for Extra Emotion
Instead of putting reverb directly on the vocal insert, create a send to an auxiliary/bus channel and put Pure Plate Reverb on that bus. This gives you independent control over the dry vocal and the reverb. If you put the reverb directly on the vocal, the reverb can overwhelm the signal.
Mixing your dry vocal into a reverb channel helps keep the vocal clear and upfront, while the reverb adds depth around it. Start with a relatively short decay, a little bit of pre-delay, and bring the send level up until you can clearly hear the vocal entering the space. Don’t be afraid to push it hard, so you can hear the effect. Once you realize it’s too much, back it down slightly.
Remember that reverb isn’t just an effect. It’s the space you’re bringing the listener into. You want them to physically imagine themselves in a hall, chamber, or room. That’s the effect you’re chasing.
Guitar Plug-In Chain
Here’s where things get really easy.
Instead of building a guitar rig from five or six separate plug-ins, use UAD Paradise Guitar Studio.
Paradise Guitar Studio is essentially an entire virtual guitar studio in a single plug-in. It combines amps, cabinets, microphones, stompboxes, pre-effects, post-effects, room sound, and more. Understanding this signal flow is the key to getting great guitar tones, and Paradise makes it easy.

Paradise Guitar Studio gives you an entire pro guitar recording chain in your DAW, complete with classic amps, cabs, mics, pedals, studio effects, and more.
Step 1: Choose Your Amp
The amplifier will have one of the biggest impacts on your guitar tone.
Paradise Guitar Studio includes 11 vintage and modified tube amp models covering a range of clean, crunch, and boutique sounds.
You don’t need to know exactly what every amp is modeled after. Instead, start by asking: do I want clean, crunch, or overdrive?
Clean
Start with something like the Dream ’65 Reverb Amp, UAD Enigmatic ’82 Overdrive Special, Showtime ’64 Tube Amp, Woodrow ’55 Instrument Amp, or Ruby ’63 Top Boost Amp.
These are great places to start when you want clarity, sparkle, chime, or a relatively clean foundation. All of these amps can also be pushed to a grittier, more characteristic sound when needed, so you may see some names repeat throughout this section.
Crunch
If you want a guitar that starts breaking up when you dig into the strings, try something like the Lion ’68 Super Lead, Ruby ’63, Enigmatic ’82, or Woodrow ’55.
Crunch is often the sweet spot for rhythm guitar because you get some natural compression and harmonic character without completely destroying the articulation of the instrument.
High Gain
For more aggressive rock sounds, start with the Lion ’68 Super Lead Amp or Enigmatic ’82.
The trick is not simply turning the gain all the way up because more gain does not automatically equal a bigger guitar sound. Sometimes, reducing the gain and adjusting other settings can make the guitar sound larger because you retain more articulation and dynamics.
Step 2: Choose Your Cabinet and Mic
Here’s something people can easily overlook: the amp is only half of a guitar rig. The cabinet and microphone have an enormous effect on what you actually hear.
Paradise Guitar Studio offers a wide selection of cabinet and microphone combinations, with various speaker sizes, speaker types, and microphone options. Think of it like recording a real amplifier! You aren’t just hearing the amp. You’re hearing:
“When shaping your guitar tone, don’t immediately reach for an EQ. Try changing the cabinet first.”
Step 3: Choose Your Effects
Paradise Guitar Studio separates effects into Pre FX and Post FX.
Pre FX happen before the amp and cabinet. It’s like what happens when you put a physical pedalboard in front of a real guitar amplifier. Paradise allows up to five Pre FX, and includes effects such as overdrive, fuzz, compression, chorus, modulation, and other stompbox-style effects.
Overdrive. An overdrive pedal before the amp can push the amplifier harder. This can be useful when you want more saturation, sustain, or midrange focus. Try an overdrive before a relatively clean amp and slowly increase the drive. You may find that you don’t need nearly as much amp gain as you expected.
Fuzz. This is a different beast entirely. It’s more extreme, more saturated, and often much less polite. Try it when you want a thick, aggressive, psychedelic, or blown-out guitar sound.
Compression. This effect can be used before an amp to help even out your playing dynamics and change how the amp responds to your guitar. It can be especially useful for clean or lightly driven tones.
Modulation. Chorus, flanger, phaser, and vibrato can all live before the amp. This can produce a more integrated, amp-like modulation sound because the amplifier itself is responding to the effect. But don’t rush to fit in every effect before the amp, because some may sound better in post.
Step 4: Add Studio Processing
Post FX happen after the amp and cabinet/microphone stage.
This is similar to taking the recorded guitar signal and adding studio effects afterward. Paradise includes effects such as 1176 compression, tape echo, delay, plate and spring reverb, EQ, and modulation in its Post FX section. This is incredibly useful because, with one plug-in, we now have a studio in a box.
Delay. Try putting delay after the amp when you want the echoes to sound cleaner and more defined.
Reverb. Reverb after the amp can make the guitar feel like it’s sitting in an actual space.
1176 Compression. Post-amp compression lets you control the dynamics of the finished guitar tone rather than controlling the guitar before it hits the amp. That can produce a very different result from using compression as a Pre FX.
Drum Plug-In Chain
API Vision Channel Strip + 1176 + Studer A800
Drums can be intimidating because a typical session might contain kick, snare, hi-hat, toms, overheads, room microphones, percussion, and multiple buses.
But if you’re a beginner, you don’t need to understand every possible drum-processing technique to get started. Instead, let’s build a simple drum bus chain together.

This classic plug-in chain for drums adds shape, punch, and glue.
Step 1: Start with a Quality Channel Strip
The API Vision Channel Strip as a useful tool for drums and percussion.
First, listen to the drum bus as a whole. Does it feel too muddy? Try a small reduction in the low-mids. Does it lack punch? Try a subtle boost in the high-mids, where the kick and snare need more presence. Does it feel dull? Mess with some high-frequency boost.
Another important note: if you’re making huge EQ changes on the drum bus, stop and ask whether the individual drum tracks need attention first. The drum bus should bring the kit together, not attempt emergency surgery.
Step 2: Add a Fast Compressor
The 1176 is a FET compressor with a very fast response, making it a natural choice when you want to control transients and add excitement.
Start with a moderate ratio such as 4:1. And set the attack somewhere around the middle to start. Make it faster for a more controlled, tighter sound, and slower for more punch and energy.
Next, set the release relatively fast to add excitement and the characteristic 1176 bounce. For fun, turn the release all the way slow, counterclockwise, so you can really hear how dramatically this affects the sound.
Then bring the input up until you’re getting around 3 to 5 dB of gain reduction in the louder sections.
Now listen. Do the drums feel more energetic and cohesive? That’s a good sign you’re heading in the right direction. If they suddenly sound flat, that’s a good sign to back it off.
Step 3: Use Tape for Character
Tape processing can add harmonic saturation and help individual elements feel more connected and sit more “on top” of the mix.
On the Studer A800 plug-in, you can drive the input until you hear the character begin to appear. Then, toggle back and forth between enable and bypass with the rest of the mix to see if it’s making an impact. If the drums feel thicker and more exciting, then you’ve nailed it! If the entire kit sounds obviously distorted or out of place, back off a bit.
“Your drum bus should bring the kit together, not attempt emergency surgery.”
Building a Plug-In Chain: Key Takeaways
Plug-in chains don’t have to be complicated. If you’re just getting started with recording and mixing, focus on learning what a few great tools do instead of trying to learn every plug-in at once.
Here are some of the important things to remember as you get started on your journey:
- Trust your ears. If your source already sounds great with minimal plug-ins or certain settings, don’t just add more or change it all because the internet said you should. If you enjoy the sound, chances are someone else will too!
- Push your effects hard at first. That way, you can hear what they’re doing and make more intentional decisions and blend them back in once you’ve found something you like.
- Solve a problem, or create a new sound. If your signal chain isn’t doing either, you probably don’t need it.
The Plug-In Chains at a Glance
|
Source |
Signal Chain |
Main Goal |
|
Vocals |
Topline Vocal Tune + Neve 1073 + LA-2A + Pure Plate |
Tone, pitch, control, and space |
|
Guitar |
Paradise Guitar Studio |
Complete amp, cab, effects, and studio chain |
|
Drums |
API Vision + 1176 + Studer A800 |
Shape, punch, and glue |
Unlock Even More Plug-In Chains with UAD Spark Studio
UAD Spark Studio gives you access to a collection of Universal Audio’s most recognizable studio tools, including all the plug-ins mentioned in this article.
That means you can build professional vocal, guitar, and drum workflows entirely in the box, without needing a rack full of hardware. Start with a few plug-ins, learn what they do, listen to what changes, then build from there! Because the best signal chain isn’t the one with the most plug-ins; it’s the one that gets you the sound you want.
Explore UAD Spark Studio and the complete collection of Universal Audio software at uaudio.com.
— Brit Rogers
Related Articles: